Part 3 of this series focused on creating a file share in Azure Storage to be used with Azure Batch. In this part, I will show how to setup a pool of compute node. This can be achieved using both the Azure Portal and the C# or Python API. I will show how to do so using the portal in general, since it may be useful to be familiar with the portal for simple use cases. Then I will provide a summary of the key instructions of the C# API to achieve the same tasks with a few lines of code, and a brief description of how to use the JSON editor in the portal to leverage the same API. The latter approaches are needed in the use case I am illustrating since I have chosen to use a file share that needs to be mounted on the pool of nodes.
In this example, a pool with standard HB 120rs v2 instances (code name: standard_hb120rs_v2) will be created. These instances come with 120 cores and 456 GB of memory, so if one is just learning about Azure Batch, I suggest using a much smaller instance to reduce costs while practicing and troubleshooting.
Using Azure Portal to set up a simple pool
The first step to create a pool in the portal is to select “Pools” in the side bar and click on “+Add”: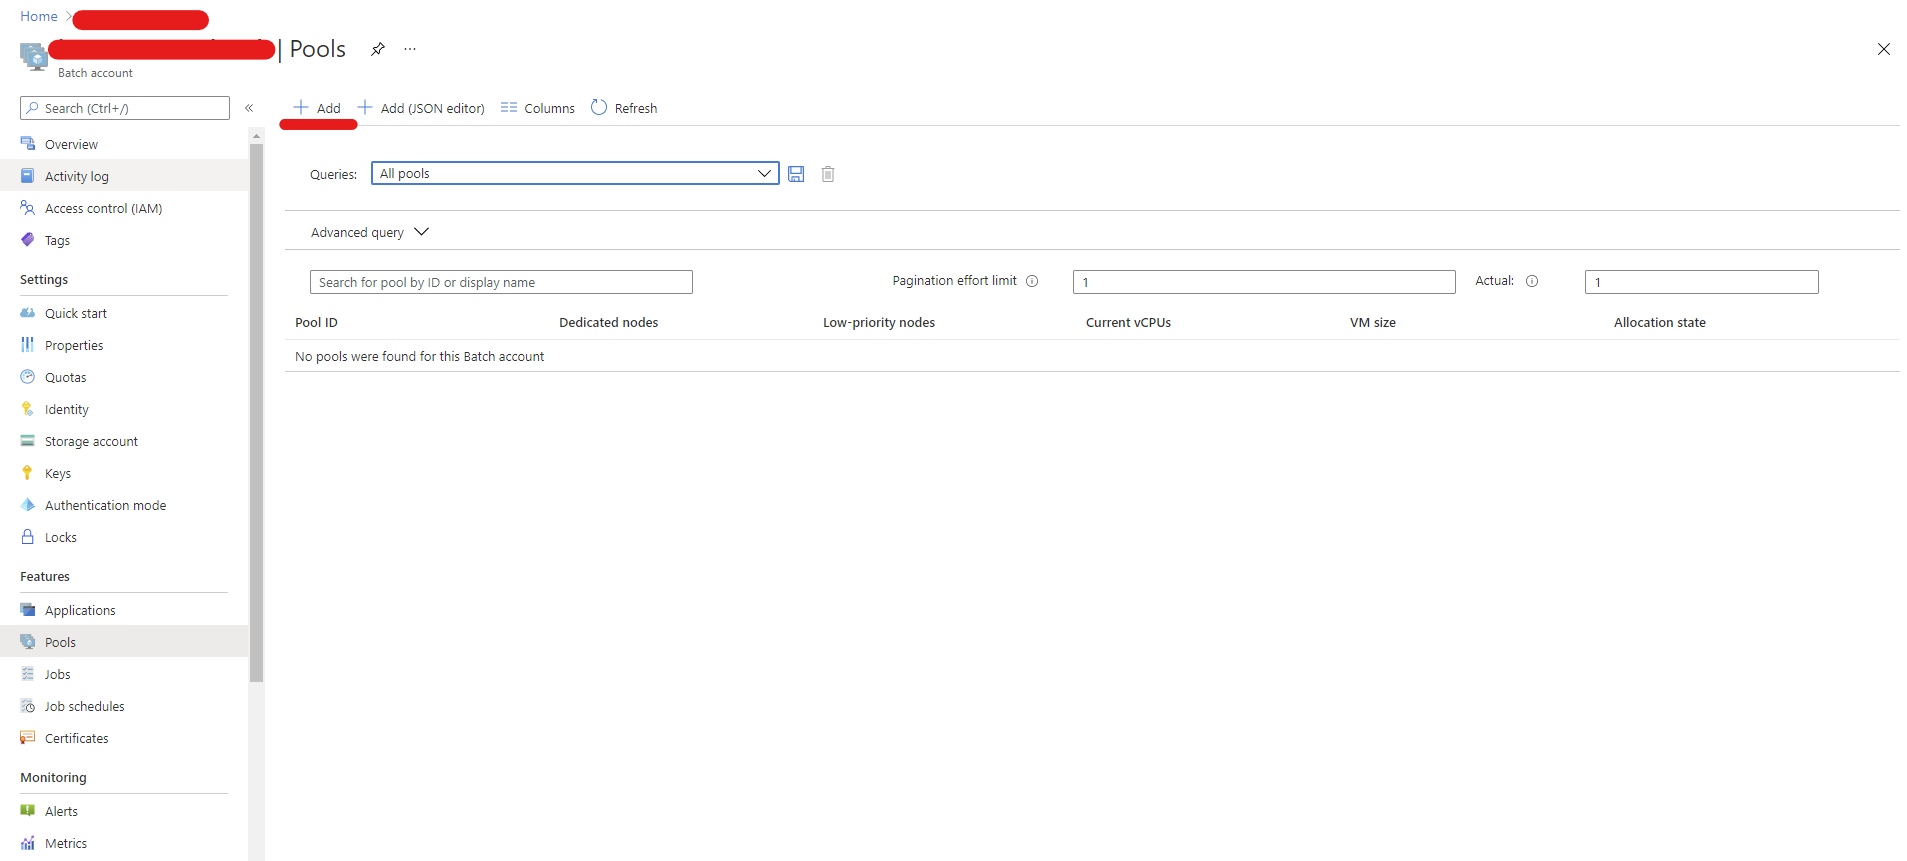
This will open the pool configuration screen:
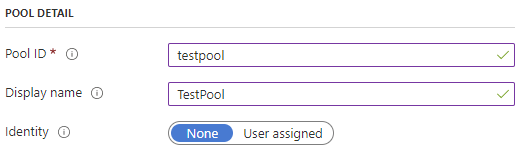
The pool ID cannot contain capitalized letters. while the display name can be a string of choice to identify the pool.
The next step consists in choosing the operating system to be executed on the compute nodes:
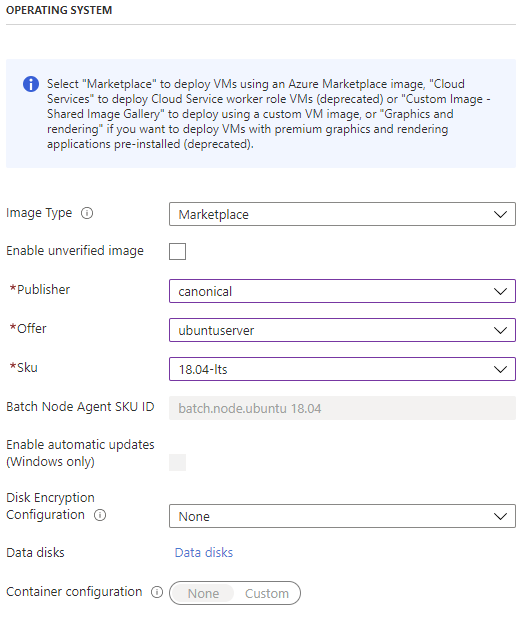
Batch provides several images for regular and containerized workload. Since in our case I wanted to directly install OpenFOAM on Ubuntu without much preparation, I simply selected “canonical” as Publisher from the Marketplace. The offer is “ubuntuserver” and the SKU is “18.04-lts”, which means Ubuntu 18.04 LTS will be the installed operating system on each compute node. It is possible to set up disk encryption, but for this tutorial I have selected not to encrypt the node disk.
Scrolling down, it is possible to select the size of the virtual machine for each node. The full pricing of the many options is available by clicking on the corresponding link.
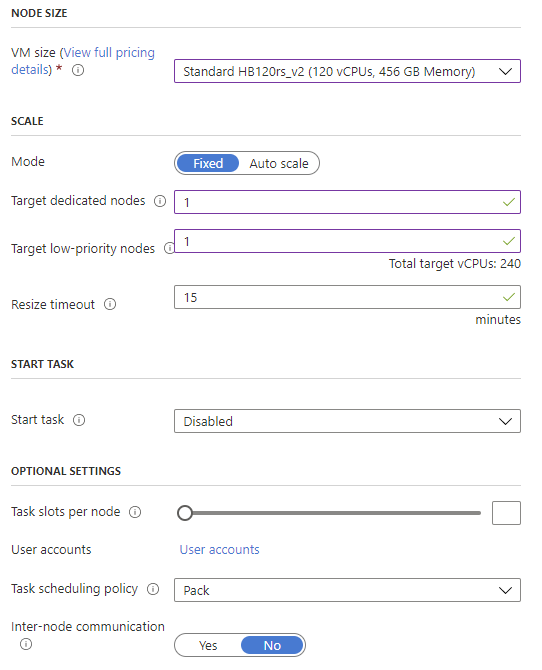
It is possible to select a fixed number of nodes, or to autoscale the pool. In this guide I use a fixed number of nodes: one dedicated and one with low priority. Low priority nodes may not be always available, but their cost is significantly lower than dedicated ones. It is possible to compine dedicated nodes and low priority nodes, depending on the needs. Dedicated nodes are guaranteed to run for the specified time, while low-priority nodes may become unavailable. However, with a sufficiently capillary strategy to store restart points for our simulations and the script illustrated in the first part, it is possible to leverage low-priority nodes to abate costs.
A start task executes a set of commands to prepare all the nodes that join the pool. I did not use it in my case; however, this is useful if all the nodes need to run the same software stack, or if common tasks to all the nodes need to be executed before launching jobs. If a start task is needed it is important to remember that:
- It is necessary to write commands specifying they must be executed into a shell, since this is not done automatically. For example, to execute the command
sudo apt-get install git, the proper syntax is/bin/bash -c "sudo apt-get install git" - If multiple commands need to be executed in sequence, there are two options:
- Concatenate them with the && operator
- Insert them into a bash script, upload it to Azure Storage, set the script as resource file and execute the script rather than the list of commands. This approach is recommended for long sequences of commands, and it also simplifies working with the C# and python APIs.
- If administrative rights are needed to execute the commands, this must be specified in the corresponding dropdown list, or the execution will fail.
Since the focus is on single-node tasks not relying on MPI, no internode communication is used and no virtual network needs to be set up. Consequently, the configuration of the pool is concluded. Once the settings are accepted, the pool will be created, and the nodes will be allocated.
Important note: after the creation of the pool, charges will apply to the corresponding Azure subscription, independently from the fact that jobs and tasks are running or not. If time is needed to set jobs up, since we are using a fixed-size pool, use one of the following strategies:
- Strategy 1:
- Allocate 1 node
- Set the job up
- Add tasks to the job
- Scale the pool to add the desired number of nodes
- Strategy 2:
- Prepare all the cases to be executed
- Use the C# or python API to automate the process of uploading cases, starting the pool and setting up jobs and tasks. More details in this approach will be given at the end of this guide.
Using the C# API for Azure Batch
The C# library for Azure Batch (or Python) allows to perform the same tasks illustrated above with a user-friendly syntax. The first step is to initialize a batch client:
var batchCredentials = new BatchSharedKeyCredentials(
                baseUrl: "AccountUrl",
                accountName: "AccountName",
                keyValue: "AccountKey");

var batchClient = BatchClient.Open(batchCredentials);
where AccountUrl, AccountName and AccountKey are the secrets obtained from the Azure Batch portal. Then the pool can be configured as follows:
var imageReference = new ImageReference(
                offer: "ubuntuserver",
                publisher: "canonical",
                sku: "18.04-lts",
                version: "latest";

var virtualMachineConfiguration = new VirtualMachineConfiguration(
                imageReference: imageReference,
                nodeAgentSkuId: "batch.node.ubuntu 18.04");

CloudPool pool = batchClient.PoolOperations.CreatePool(
                poolId: "testpool",
                virtualMachineSize: "standard_hb120rs_v2",
                virtualMachineConfiguration: virtualMachineConfiguration,
                targetDedicatedComputeNodes: 1,
                targetLowPriorityComputeNodes: 1);
Since we decided to use a file share, it can be directly mounted using the API. To this purpose, it suffices to first specify the file share settings and the Azure Storage credentials as follows, by replacing the … with actual data from the Azure Storage portal page:
var fileShareConfiguration = new AzureFileShareConfiguration(
                accountName: ...,
                azureFileUrl: ...,
                relativeMountPath: ...,
                accountKey: ...,
                mountOptions: "-o vers=3.0,dir_mode=0777,file_mode=0777,sec=ntlmssp");
Then, the mount instruction can be added to the pool object created before as follows:
pool.MountConfiguration = new[]
{
    new MountConfiguration(configuration: fileShareConfiguration)
};
Finally, the pool can be created by committing the settings with the instruction:
await pool.CommitAsync();which will allocate the pool in Azure Batch.
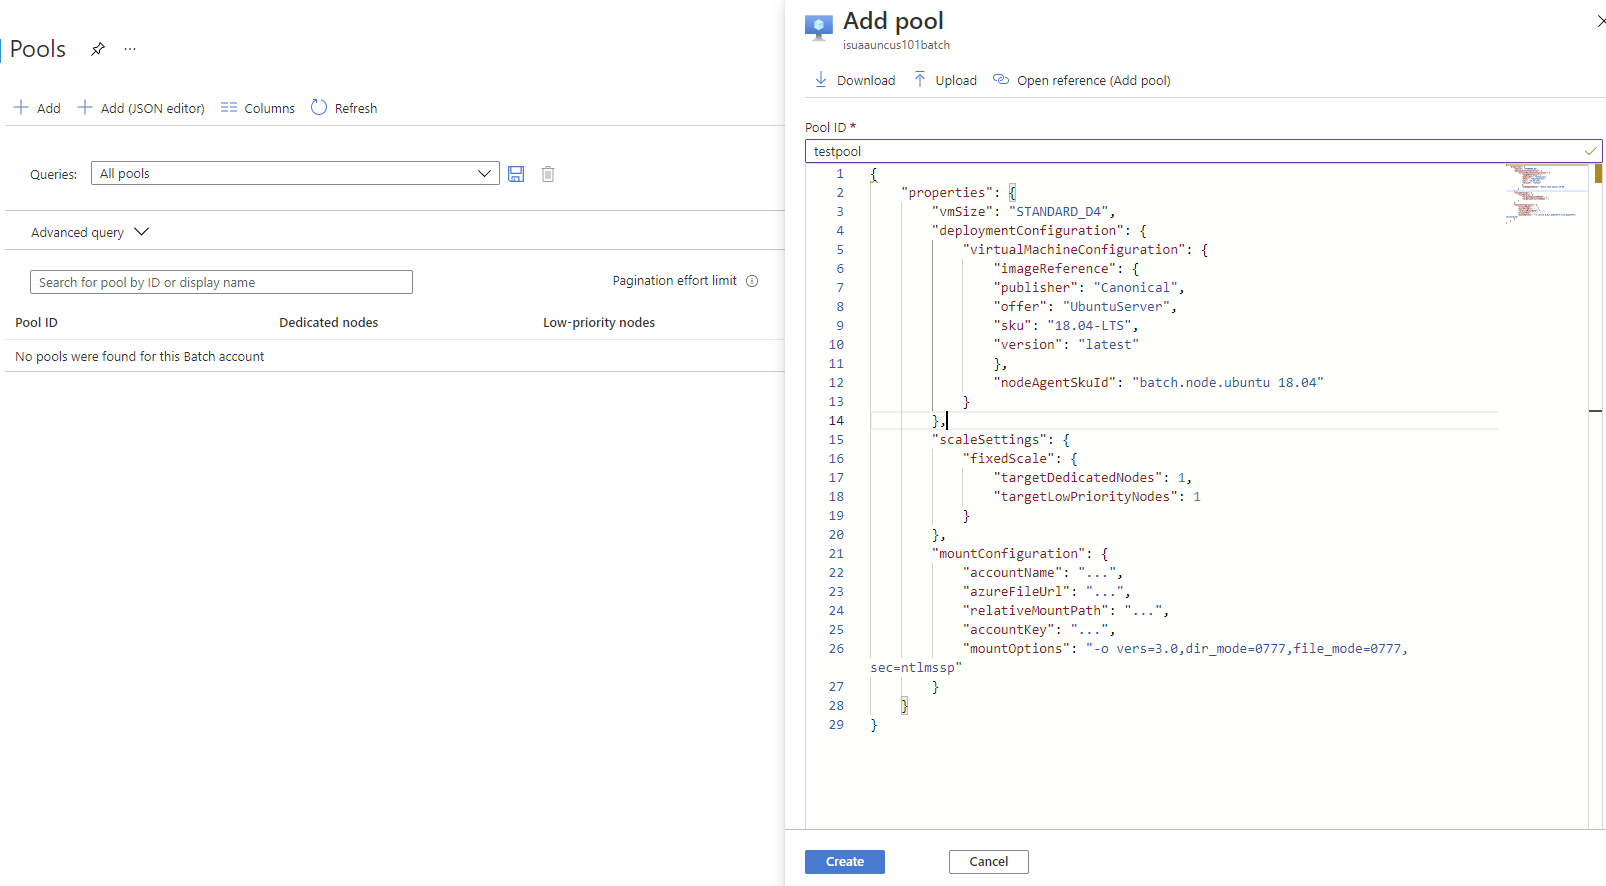
Note: Further information on mounting a file share can be found in the documentation. At the time I am writing this post, I am unaware of a way of mounting file shares in Azure Batch using the portal user interface. However, the Batch API is available via the JSON configuration option. The “+Add (JSON editor)” button opens the corresponding editor, as shown below. The configuration to mount the share is also illustrated using the same setup discussed above.
Important note: credentials and secrets mentioned above should not be directly stored in the code or in files that may become accessible to others or published in code repositories. .Net allows secrets to be managed using the application configuration, while storing them, in development, on the local machine in a separate location. Visual Studio simplifies this process by automatically creating a secrets.json file and setting up the <UserSecretsId></ UserSecretsId> entry in the project configuration. However, the same can be achieved manually. Refer to the .Net and Visual Studio documentation for more information.
In the next part I will show how to add jobs to a pool.
Stay tuned! 🙂
This offering is not approved or endorsed by OpenCFD Limited, the producer of the OpenFOAM software and owner of the OPENFOAM® and OpenCFD® trade marks. Alberto Passalacqua is neither associated to OpenCFD Ltd nor to Microsoft and did not receive funding from them to write this article. All registered trade marks belong to their legal owners.